Drupal Development on a Virtual Ubuntu. Part 1: Install Virtualbox and Ubuntu on Windows
In this screencast, we're going to see how to install Virtualbox on your Windows machine. Then we'll create a new guest Ubuntu installation in order to run LAMP server and install Drupal later on. We'll also install Virtualbox guest additions for better integration with the guest OS and setup shared folders between Windows and Ubuntu.
Watch the Screencast
Tutorial In a Nutshell
1. Download Virtualbox and Ubuntu
First, you need to download Oracle (formerly Sun) Virtualbox and then Ubuntu. Grab Virtualbox installer for windows and the latest Ubuntu distro image (this tutorial is using Ubuntu 10.04 Lucid). Run the Virtualbox installer.
2. Create and configure a new virtual machine in Virtualbox
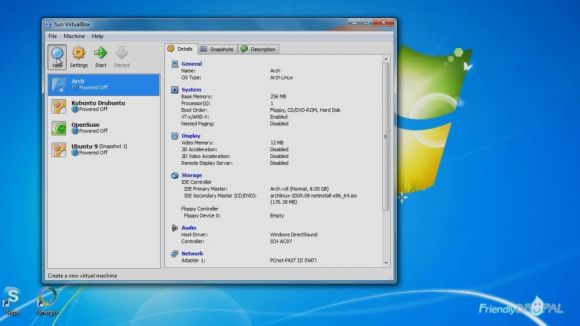
In the Virtualbox window click on the New button in the top left corner and then follow the wizard.
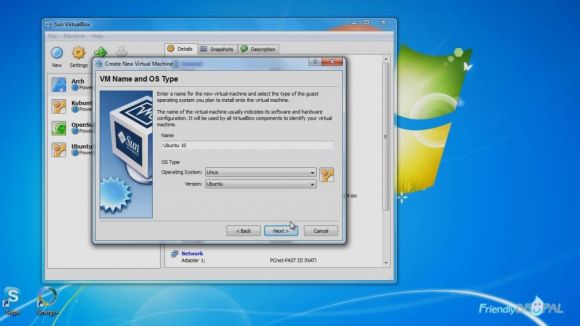
Give it a name and choose Operating System: Linux and Version: Ubuntu. Click Next.
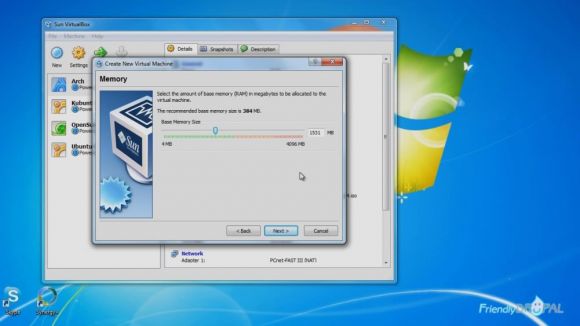
In the next window, select the portion of RAM available to your virtual machine, depending on your system. I recommend at least 1024 MB.
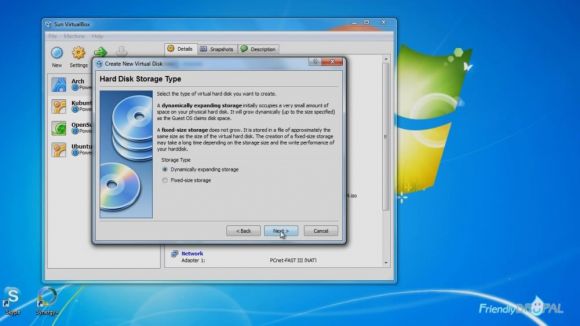
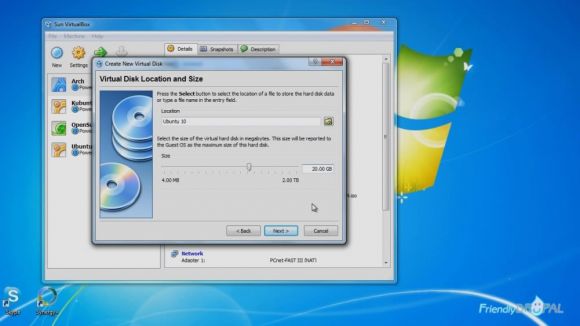
Next is Hard Disk setup. It's safe to go with the default Dynamically expanding storage.
Enter the maximum disk size and close the wizard.
You can configure your new Ubuntu virtual machine settings by choosing it and clicking on the Settings button in the top left corner.
3. Install Ubuntu on Virtualbox virtual machine.
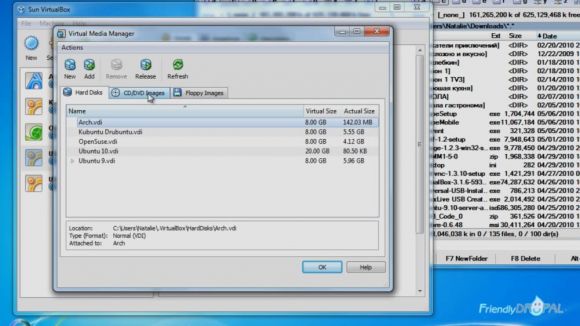
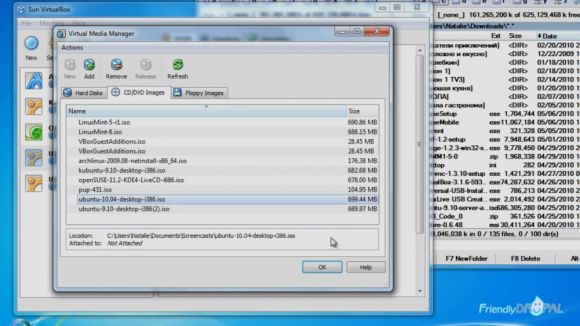
As soon as Ubuntu disk image has donwloaded, you can add it by going to File->Virtual Media manager. Then choose CD/DVD Images.
Click on Add button and find the image. Press Ok when you're done.
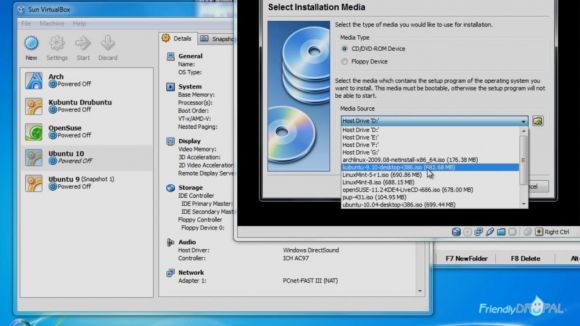
Click start in the main menu and you'll see the First Run Wizard for this machine. Choose the necessary disk image in the Media Source drop down. Finish the wizard.
Note: once the installation starts, your mouse is going to be captured (i.e. "stuck") in the virtual machine window. Click Right Ctrl to go back to Windows.
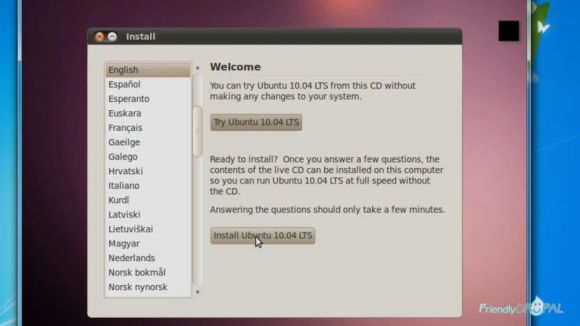
Next, leave English as default and choose Install Ubuntu button.
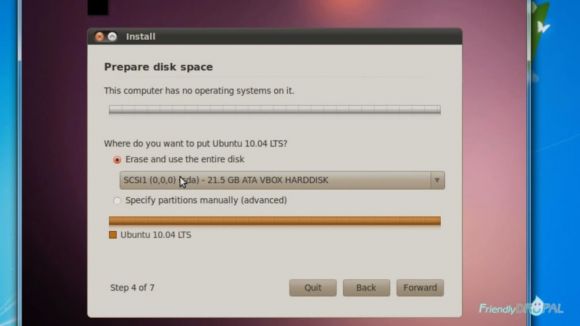
Choose your time zone and Keyboard layout. Next, choose Erase and use the entire disk option (it's the same disk we've setup before - don't worry, it's not going to delete anything from your computer).
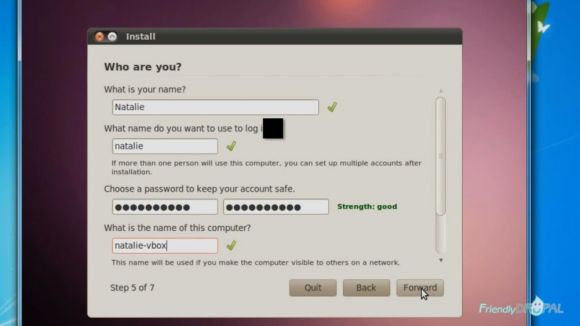
In the next step, enter your name, your login, password and the name of the computer (for the network, for example). Click forward.
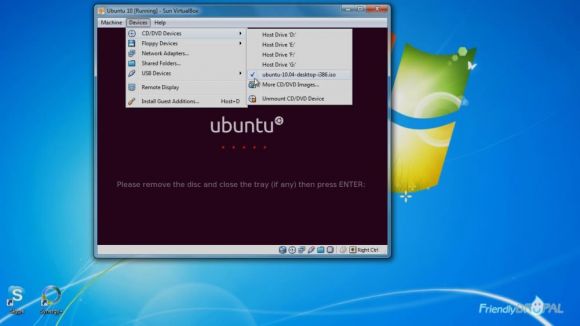
When you're ready to install, click the install button. Click restart when prompted. Then unmount the disk by going to Devices > CD/DVD Devices and clicking on the ubuntu image used for installation. Then press Enter.
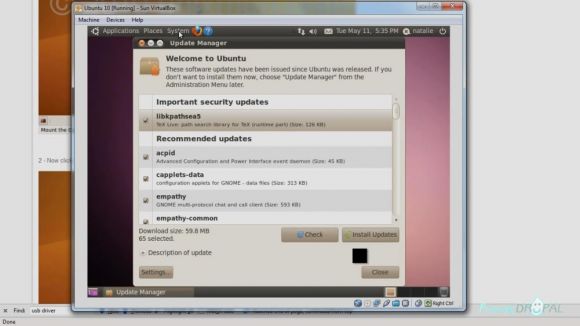
Once Ubuntu is rebooted, you should run the updates in the Update manager. If you're not prompted, you can find Update Manager in System>Administration menu. Restart when prompted.
4. Install virtualbox guest additions for Ubuntu guest on Windows host.
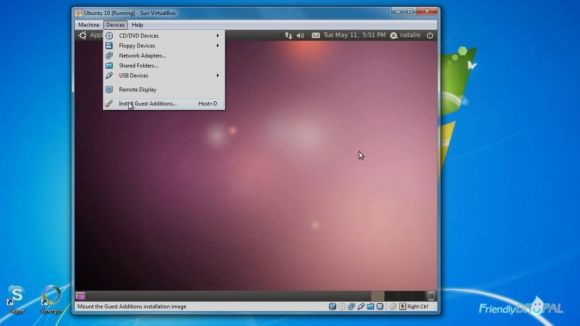
Then we're going to install guest additions and setup shared folders. Virtualbox Guest Additions allow much better integration of the guest OS, such as resizing the window and mouse/keyboard integration (for example, copy and pasting). In the Virtualbox window menu, go to Devices>Install Guest Additions...
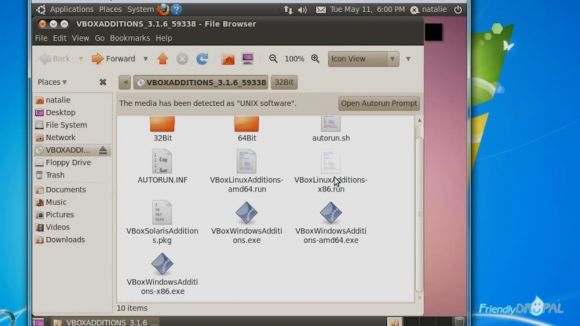
If you don't see the shortcut to the Guest Additions on Ubuntu desktop, you'll probably find it in Places. You'll also might get a prompt from Virtualbox to download the guest additions - agree to that. Open vboxadditions and choose the appropriate file (usually VBoxLinuxAdditions-x86.run).
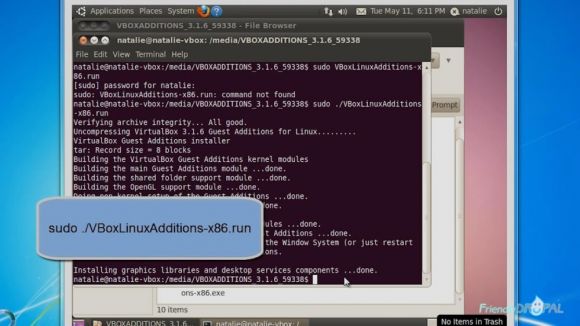
You can also install it using the command line. CD to the vboxadditions directory and then type "sudo ./VBoxLinuxAdditions-x86.run".
You'll need to restart to activate guest additions after installation. However, if you want to set up shared folders with your host OS (next step) you'll need to shut down Ubuntu because you can't change settings for the machine that is still running.
5. Set up a shared folder from Windows to Ubuntu on Virtualbox.
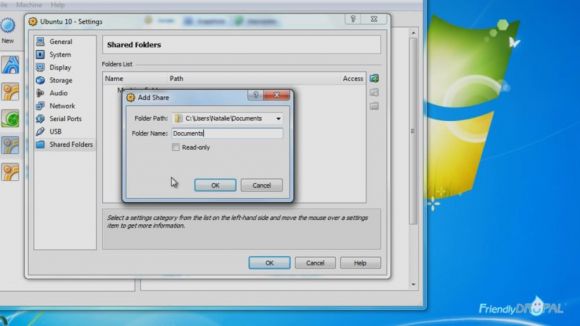
When the machine is turned off, go to Settings > Shared Folders. Click on the little folder with a plus button and find a folder you want to be available to Ubuntu. Give it a name.
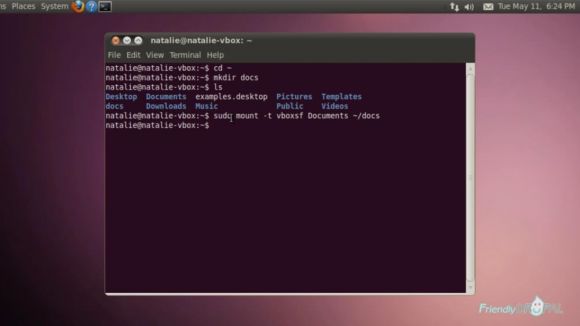
Unmount VBoxGuestAdditions.iso from Devices and start Ubuntu. Open a terminal and create a new directory in your home folder to serve as a mount point for the share and then mount it to your share
$ mkdir [name of directory]
$ sudo mount -t vboxsf [name of share] [name of directory]
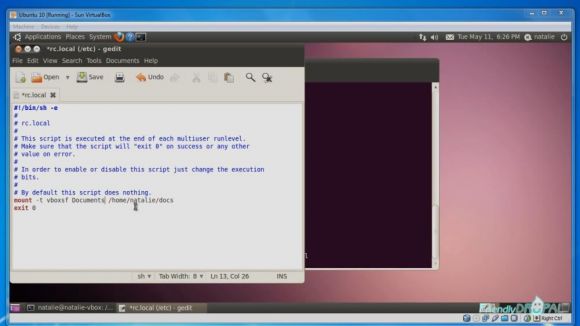
The shared folder should be accessible now. However, in order to make the mount permanent and not go away on the reboot, you'll need to edit rc.local file.
$ sudo gedit /etc/rc.local
Then add
mount -t vboxsf <name of share> <absolute path to the mount directory>
Save rc.local.
6. Install a new language on Ubuntu.
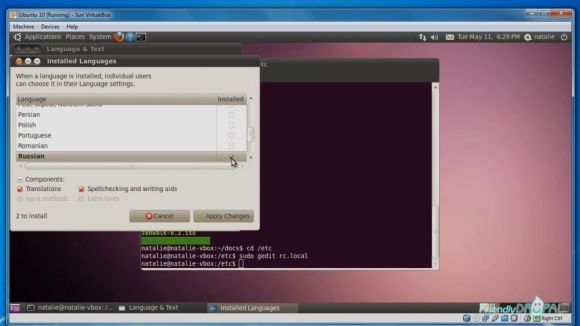
This is optional, but if you want, you can add additional languages in System > Administration > Language Support. Then choose Install Languages.
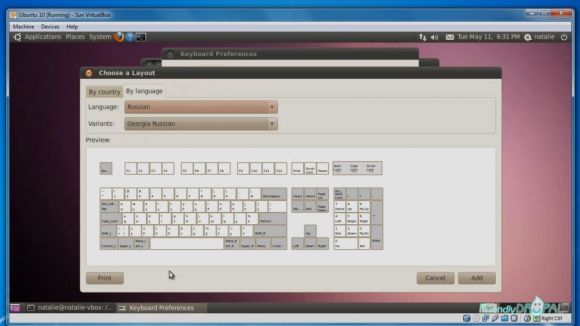
Don't forget to add the appropriate keyboard layout (Preferences > Keyboard).
Conclusion.
Congratulations, the first vital step to Drupal development on Ubuntu in Virtualbox is done. Next up is LAMP, Drupal, Netbeans and other adventures.
If you liked it this story, you might like the following:

