Drupal Development on Ubuntu with Virtualbox. Part 6: Serving Websites from Ubuntu to Windows
Watch the Screencast
Tutorial In a Nutshell
Software used: Ubuntu 10.04, Vbox 3.2.8
Configure Virtualbox network settings
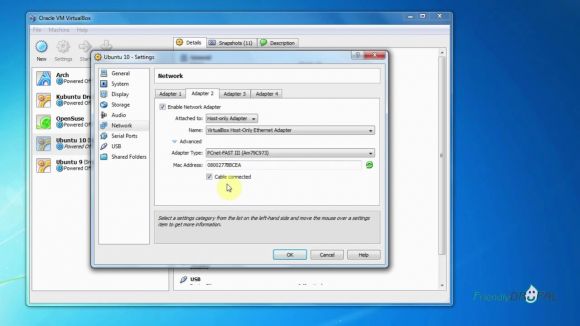
Shutdown the virtual machine if you have it turned on. Go to Settings->Network and enable Adapter 2 (don’t change anything on Adapter 1 tab, you’ll need to connect to the internet). For Attached to dropdown choose Host-only Adapter and click Ok to save.
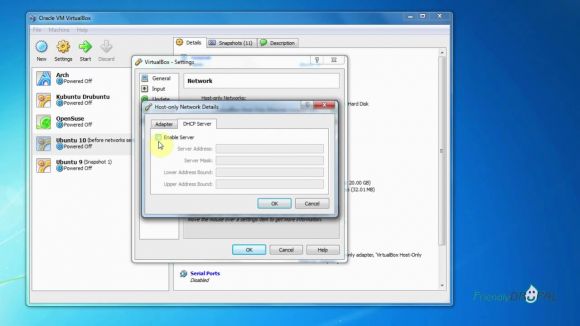
Then open File -> Preferences -> Network. On DHCP Server tab, uncheck Enable Server as we’ll be using a static IP for the server.
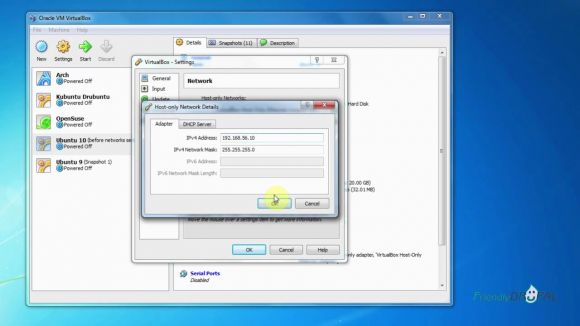
On Adapter tab assign an IPv4 address (I chose the one with the 10 range – 192.168.56.10). Save it then start Ubuntu again.
Configure networking on Ubuntu
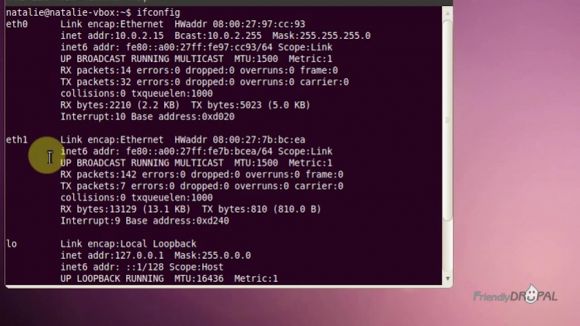
In Ubuntu, open the terminal and type ifconfig to check the network configuration. You’ll see the second interface (usually eth1).
Next we’ll modify the network interfaces
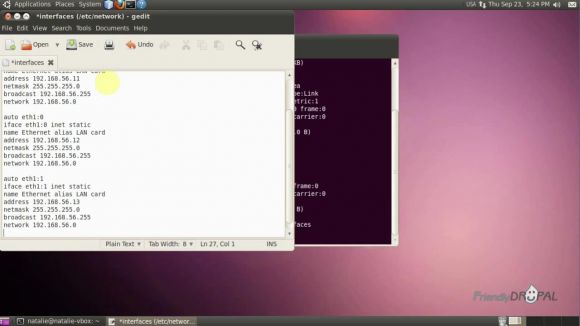
$ sudo gedit /etc/network/interfaces
Append these lines to the file:
In short, we’re assigning 3 IPs to be used for the virtual hosting of our development websites. Save it and close. Restart networking:
$ sudo /etc/init.d/networking restart
If you run ifconfig now, you should see the new IPs in use.
Set up Apache virtual hosts and modify hosts files
Cd to /etc/apache2/sites-availalable. Open one of the files (or create a new one) and change VirtualHost directive to use one of the IPs. It should look something like this:
<VirtualHost 192.168.56.13:80>
ServerAdmin webmaster@localhost
ServerName drupal616
DocumentRoot /home/natalie/drupalsites/drupal-6.16
<Directory />
Options FollowSymLinks
AllowOverride All
</Directory>
</VirtualHost>
Restart Apache.
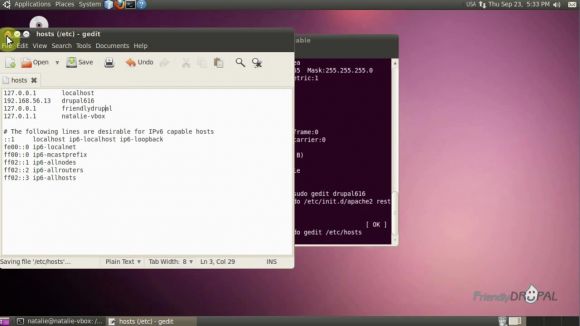
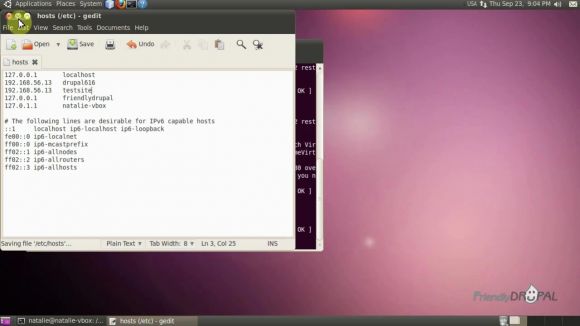
Next the hosts file for both guest and host operating systems. On Ubuntu it’s on etc/hosts.
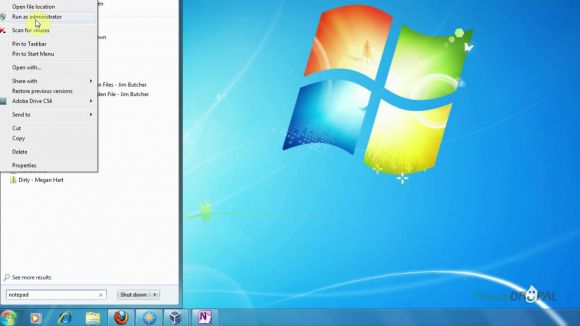
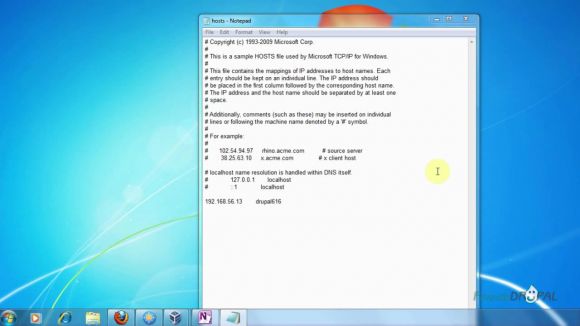
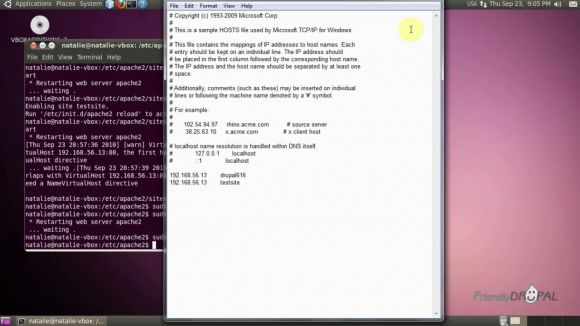
On Windows, you need to open the hosts file as an Administrator to be able to modify it. Go to Start and search for Notepad. Then right click and choose Run as administrator:
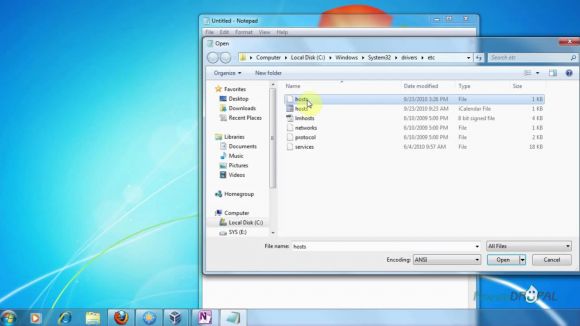
Then go to File->Open and go to Windows->System32->drivers->etc and choose All Files in the dropdown. Open the hosts file.
Add the website and the IP address to the file the same as you did for the Ubuntu hosts file.
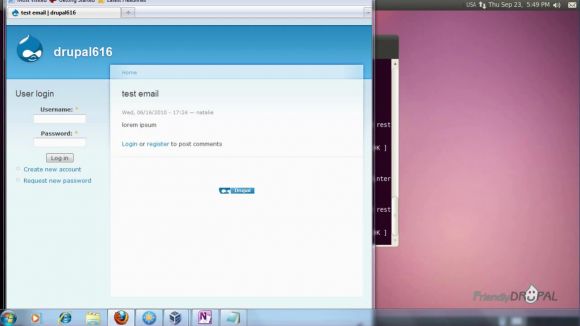
Now if you open the browser on Windows and type in the website URL it should load.
Repeat the steps using free IPs when you need to add a new website.
Hosting multiple websites on the single IP
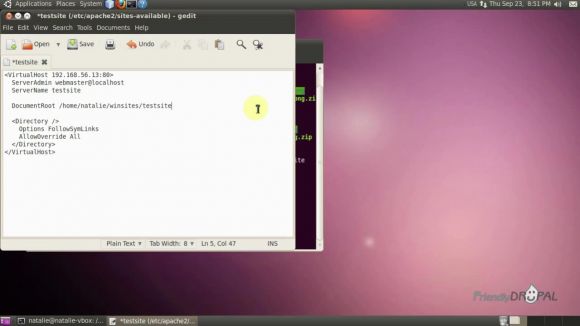
You can also set up shared folders to serve the files from the Windows machine (just point to the mount directory in the Apache host file). I use the same IP in this example as I’ve used for the previous website.
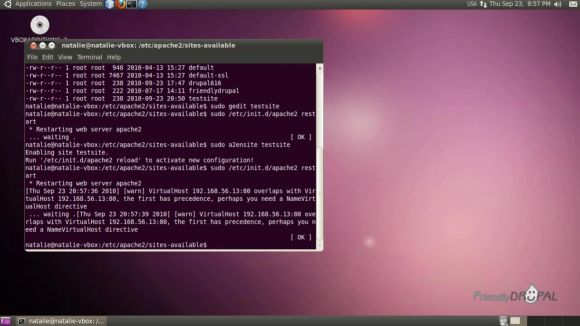
Now enable the website
$ sudo a2ensite <sitename>
Now if you reload Apache you’ll get the warning to configure NameVirtualHost directive to be able to serve more than one website from the same IP.
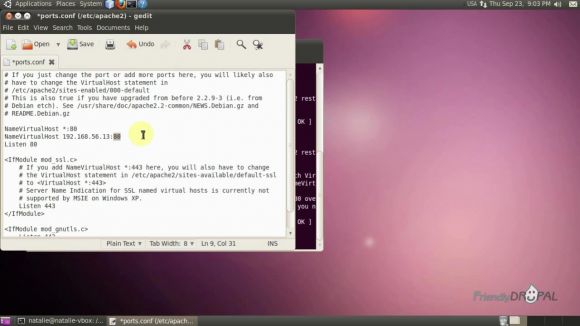
Open the ports config file from /etc/apache2/ directory:
$ sudo gedit ports.conf
Add NameVirtualHost with your IP:
Make sure you’re consistent: if you’re using port 80 in the Apache virtual host file, you should use it here as well.
Save the file and restart Apache. Now you can add the new website in the hosts files of Ubuntu and Windows.
Now you should be able to load both websites in Windows (I’ve just added a dummy index file to the testsite directory to check it).
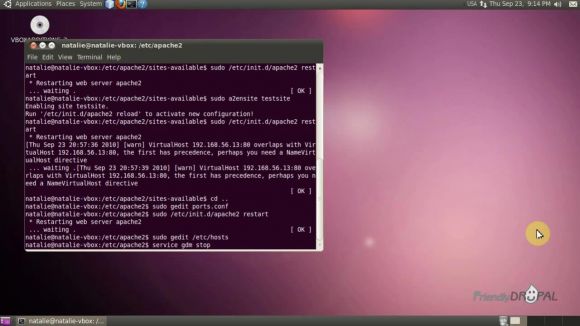
At this point, you don’t need to use the GUI anymore. You can turn it off by running service gdm stop:
Then, if you install SSH, you can administer Ubuntu through the command line (Putty is a popular choice for Windows).
If you liked it this story, you might like the following:

